


The following sections discuss the physical parts of a scroll.
Margins
Margins are areas on the edges of a page that have no design or paint on them. they were a feature in period manuscripts as well as being useful for mounting a mat for framing purposes. Oftentimes, framing with a mat is better for the artwork as it is not great for paint to sit flush against the glass much less any gilding or goldwork. As a general rule it is recommended to make framing as easy as possible so that the chances of your art work being framed and displayed on a wall of the recipients is higher.
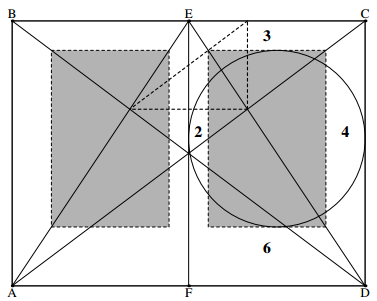
An aesthetically pleasing margin is 1/8th the width of the paper, meaning not less than ½ inch and up to 2 inches depending on the size of paper. Margins and ruling guides can be erased after the piece is completed or may remain depending on what’s most appropriate to the period style of the design. Scrolls sizes differ according to the exemplar (the example of the original scroll) used. It is suggested to use a size similar to the exemplar but that will fit a standard frame size.
A standard size framing mat used as a template for margins will allow you to quickly and easily determine margin spacing that will allow the recipient to mat the scroll to a market standard frame size without covering portions of the work. Any scroll sizes created that are outside of this range would have to be specially framed and matted which may be more expensive for the recipient and also could hamper the opportunity of having your scroll displayed on the wall instead of being stuck in a drawer.
Common framing sizes are:
| Scroll Size | Frame size with Mat |
| 4×6 | 6×8, 8×10 |
| 5×7 | 8×10, 11×14 |
| 8×10 | 11×14, 12×14 |
| 9×12 | 11×14, 12×14 |
| 11×14 | 11×14, 12×14 |
| 16×20 | 20×24, 24×28 |
Layout
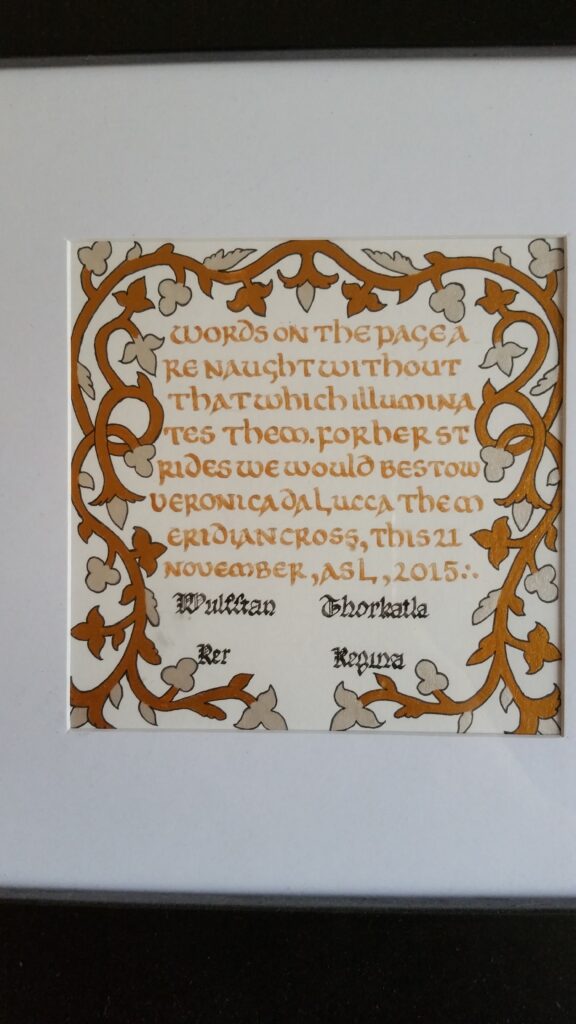
Below are two very common layouts for scrolls, though there are MANY others. One has a decorated initial letter with calligraphy filling in the rest, though additional decorations are frequently added. The other has a full border with a textbox on the inside. With all scrolls, leave 1~2″ at the bottom for signatures and/or seals. (Click to enlarge)


Text Box
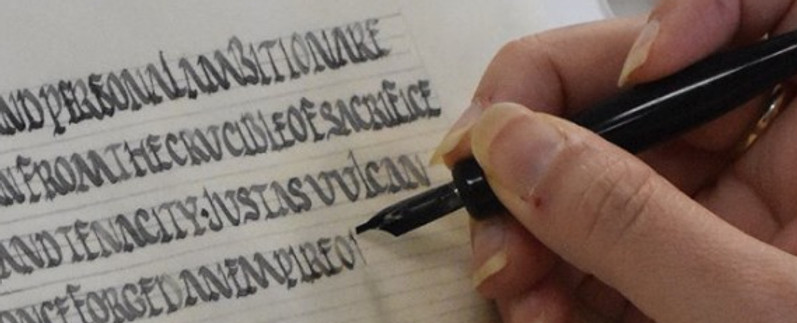
The Text Box is the space on a scroll that should encompass the scroll wording and the signatures and seals. The calligraphy hand should match the style of the design whenever possible. An early period illumination should have an early period hand that would have been used at that time, if not a hand based off of the calligraphy used in the manuscript that the illumination came from. If the correct hand is not in your repertoire, you may either trace the calligraphy or network with other scribes to find someone who knows the appropriate hand. In period, calligraphy and illumination were frequently done by separate individuals and working with another scribe can be highly rewarding.
Be kind to the herald and include a typed or printed transcript of the wording for the Herald to read in court.
*More information on Calligraphy will be in the Calligraphy tab of this Handbook.

Text Box Layout is just as important and the layout for illumination. A well thought out layout can significantly improve the overall look of a scroll and can enhance the medieval aesthetic. Things to consider when laying out the text space.
- Letter spacing
- Height of letters
- Width of letters
- Line spacing
- Paper size
- Text block size
- Text Box Margins
- Double columned page
Suggestions: write out the text in pencil first to see if any alteration is needed in the text to fit in the space available.
Another option is to recreate the text box dimensions on a separate sheet of paper and ink out the text using the hand you intend to use in the final product. This will give you a chance to make changes before adding to the final piece as well as practicing the hand. It is common to omit letters and words when writing the text as one begins to focus on the strokes and not the words. Practicing the text out beforehand as suggested can help mitigate that propensity. Also, if the lettering is done before the painting is started, it will not hurt as much to discard and start over in the event that a word is misspelled or left out, or the ink is accidentally smeared.
Once the calligraphy is to your satisfaction, move on to the next step.


Seals and Signatures
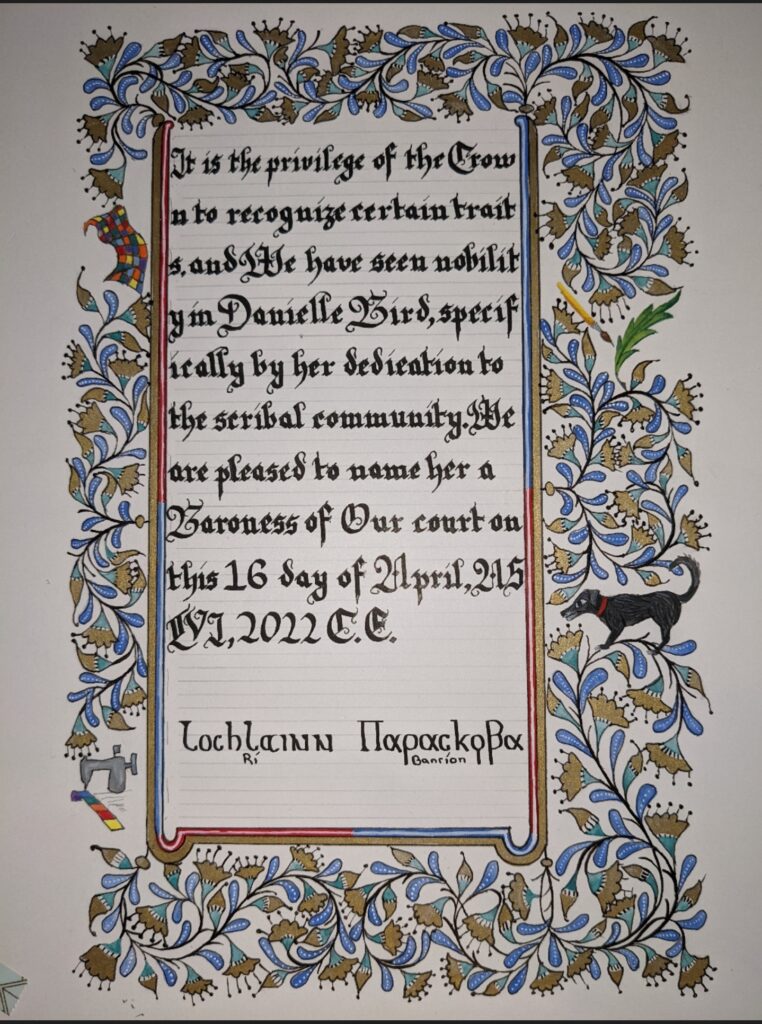
Signature spaces are always required for the Sovereign and Consort (except as noted in the Scroll Texts section). On scrolls for armigerous awards (those which carry precedence), a space is also needed for the Beacon Principal Herald, as indicated by the Crowns prerogative. A block of space at least 1 1/2” high should be left at the bottom of the scroll for these signatures. Room must be left near this block for the seals: circles approximately 1 1/2”in diameter for the Sovereign, Consort, and, if required the Beacon.
Pencil in lines for the Crowns signature unless the exemplar calls for inked lines. Alternatively, signature spaces may be indicated by writing Rex and Regina (Latin for King and Queen, respectively), or Sovereign and Consort, and, if required, Beacon Principal Herald (or simply, Beacon), leaving a blank space for the appropriate signature. Sovereign and Consort signatures should appear side by side, with the Beacon’s signature centered below them. If necessary, the Herald’s signature may appear on the stamp level, but to the right of the Royal signatures.
Scribe’s Signature
Always sign your name on the back of the work in pencil or pen if behind a painted area or in the margin area, so as to not show through the paper. A small makers mark in a not-too-obvious place may also be added to the design of the scroll if the artist so chooses. Indicate all of the participants of a scroll on the back even if there are multiple signatures. For example, a signature for the sketch artist, the liner, gilder, the calligrapher, and the painter or even multiple if there are multiple painters. If one artist does all of these steps, write “Scroll by (name).” Recipients like to know who painted their scroll.
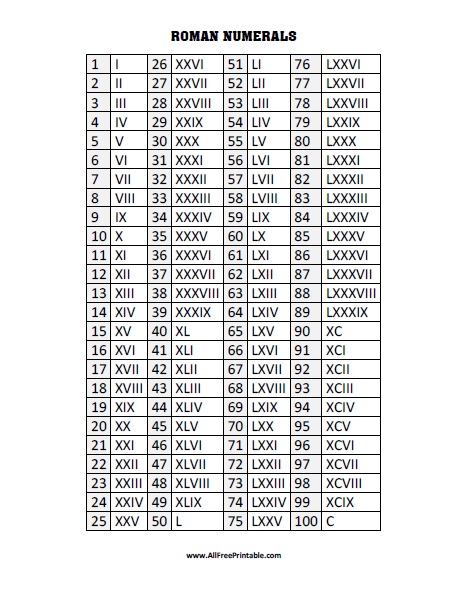
Roman Numeral System
Society Dates
| From 1 May of | To 30 April of | Corresponds To |
|---|---|---|
| 2023 C.E | 2024 C.E. | A>S. LVIII (58) |
| 2022 C.E. | 2023 C.E. | A.S. LVII (57) |
| 2021 C.E. | 2022 C.E. | A.S. LVI (56) |
| 2020 C.E. | 2021 C.E. | A.S. LV (55) |
| 2019 C.E. | 2020 C.E. | A.S. LIV (54) |
| 2018 C.E. | 2019 C.E. | A.S. LIII (53) |
| 2017 C.E. | 2018 C.E. | A.S. LII (52) |
| 2016 C.E. | 2017 C.E. | A.S. LI (51) |
| 2015 C.E. | 2016 C.E. | A.S. L (50) |
| 2014 C.E. | 2015 C.E. | A.S. XLIX (49) |
| 2013 C.E. | 2014 C.E. | A.S. XLVIII (48) |
| 2012 C.E. | 2013 C.E. | A.S. XLVII (47) |
| 2011 C.E. | 2012 C.E. | A.S. XLVI (46) |
| 2010 C.E. | 2011 C.E. | A.S. XLV (45) |
| 2009 C.E. | 2010 C.E. | A.S. XLIV (44) |
| 2008 C.E. | 2009 C.E. | A.S. XLIII (43) |
| 2007 C.E. | 2008 C.E. | A.S. XLII (42) |
| 2006 C.E. | 2007 C.E. | A.S. XLI (41) |
| 2005 C.E. | 2006 C.E. | A.S. XL (40) |
| 2004 C.E. | 2005 C.E. | A.S. XXXIX (39) |
| 2003 C.E. | 2004 C.E. | A.S. XXXVIII (38) |
| 2002 C.E. | 2003 C.E. | A.S. XXXVII (37) |
| 2001 C.E. | 2002 C.E. | A.S. XXXVI (36) |
| 2000 C.E. | 2001 C.E. | A.S. XXXV (35) |
| 1999 C.E. | 2000 C.E. | A.S. XXXIV (34) |
| 1998 C.E. | 1999 C.E. | A.S. XXXIII (33) |
| 1997 C.E. | 1998 C.E. | A.S. XXXII (32) |
| 1996 C.E. | 1997 C.E. | A.S. XXXI (31) |
| 1995 C.E. | 1996 C.E. | A.S. XXX (30) |
| 1994 C.E. | 1995 C.E. | A.S. XXIX (29) |
| 1993 C.E. | 1994 C.E. | A.S. XXVIII (28) |
| 1992 C.E. | 1993 C.E. | A.S. XXVII (27) |
| 1991 C.E. | 1992 C.E. | A.S. XXVI (26) |
| 1990 C.E. | 1991 C.E. | A.S. XXV (25) |
| 1989 C.E. | 1990 C.E. | A.S. XXIV (24) |
| 1988 C.E. | 1989 C.E. | A.S. XXIII (23) |
| 1987 C.E. | 1988 C.E. | A.S. XXII (22) |
| 1986 C.E. | 1987 C.E. | A.S. XXI (21) |
| 1985 C.E. | 1986 C.E. | A.S. XX (20) |
| 1984 C.E. | 1985 C.E. | A.S. XIX (19) |
| 1983 C.E. | 1984 C.E. | A.S. XVIII (18) |
| 1982 C.E. | 1983 C.E. | A.S. XVII (17) |
| 1981 C.E. | 1982 C.E. | A.S. XVI (16) |
| 1979 C.E. | 1981 C.E. | A.S. XV (15) |
| 1978 C.E. | 1980 C.E. | A.S. XIV (14) |
| 1978 C.E. | 1979 C.E. | A.S. XIII (13) |
| 1977 C.E. | 1978 C.E. | A.S. XII (12) |
| 1976 C.E. | 1977 C.E. | A.S. XI (11) |
| 1975 C.E. | 1976 C.E. | A.S. X (10) |
| 1974 C.E. | 1975 C.E. | A.S. IX (9) |
| 1973 C.E. | 1974 C.E. | A.S. VIII (8) |
| 1972 C.E. | 1973 C.E. | A.S. VII (7) |
| 1971 C.E. | 1972 C.E. | A.S. VI (6) |
| 1970 C.E. | 1971 C.E. | A.S. V (5) |
| 1969 C.E. | 1970 C.E. | A.S. IV (4) |
| 1968 C.E. | 1969 C.E. | A.S. III (3) |
| 1967 C.E. | 1968 C.E. | A.S. II (2) |
| 1966 C.E. | 1967 C.E. | A.S. I (1) |